Giới thiệu
Material UI Component được tạo ra dựa trên sự kết hợp giữa lý thuyết design của Google và thư viện tạo UI Reactjs của Facebook.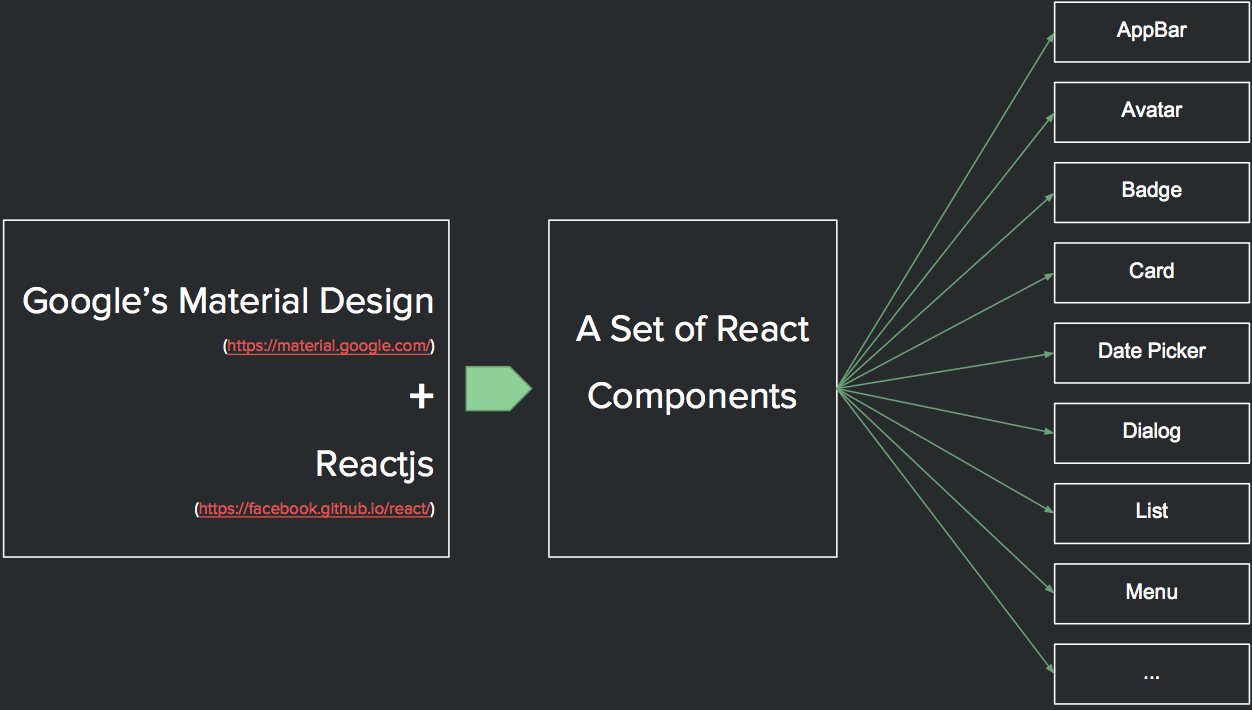
Xin mời bạn vào trang: http://www.material-ui.com, vào mục components để xem tất cả các MUI Components mà nó đang cung cấp.
Sample
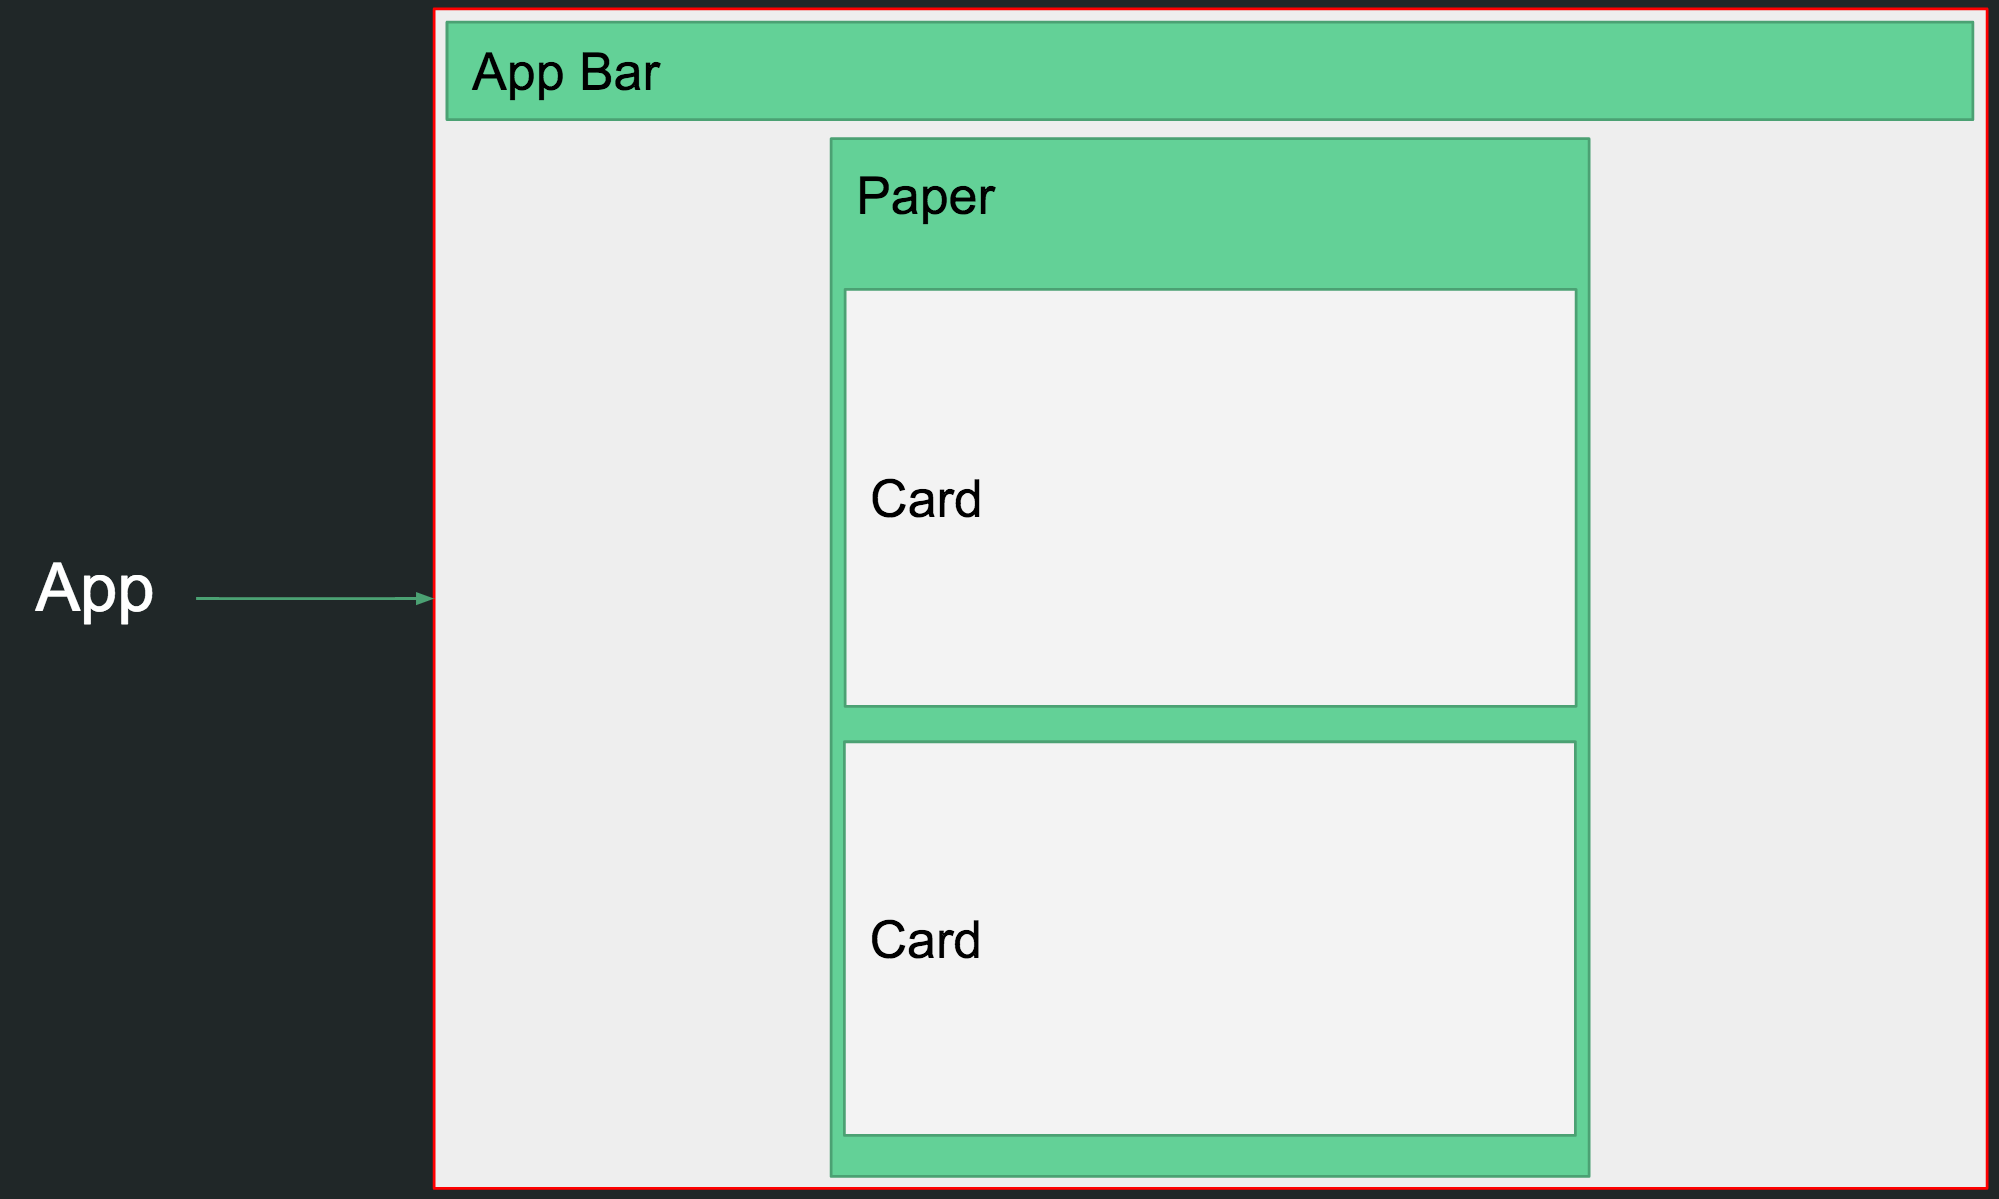
Bây giờ chúng ta thử build 1 layout như sau.
Phần bên ngoài bọc tất cả, chúng ta gọi là App, trong App có phần header, bên dưới header là container bọc lấy các block.
Bây giờ ta tìm trong MUI Component, thì chúng ta có thể hình dung các MUI Component tương ứng sẽ như sau:
Howto
Technology
Để thực hiện sample trên, chúng ta sử dụng các tool như là babel, để compile es2015 và webpack để load các modules, component cần thiết.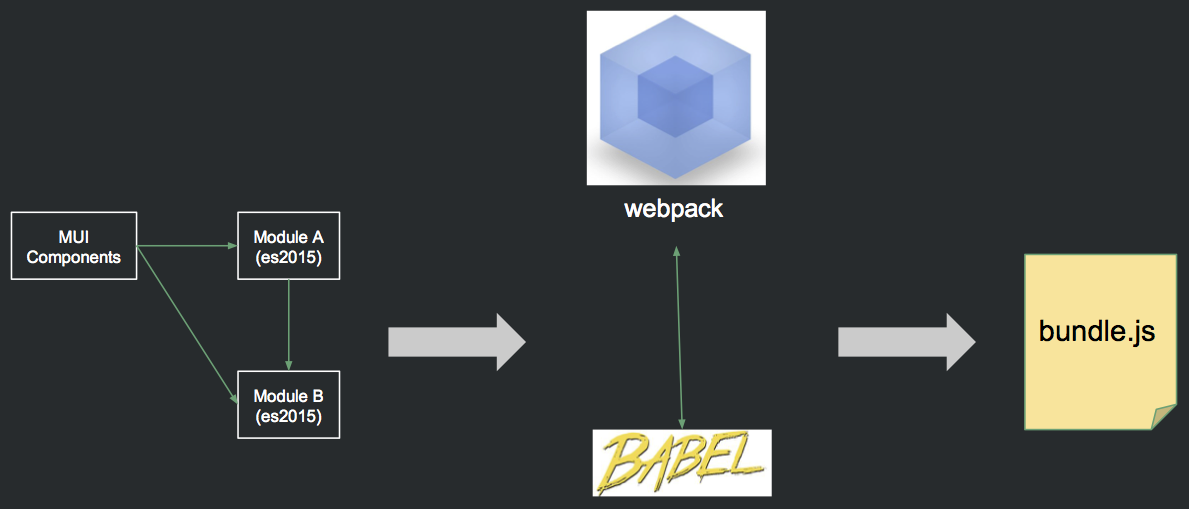
Chuẩn bị
- Tạo thư mục:
mkdir react-mui-sample - Init project:
npm init, khi chạy lệnh này trên màn hình terminal sẽ yêu cầu bạn nhập các thông tin cần thiết. - Install React, ReactDOM, MaterialUI và plugin, tool
npm install react react-dom react-tap-event-plugin material-ui --save-dev
npm install webpack babel-cli babel-preset-es2015 babel-preset-react babel-loader --save-dev.babelrc, nhập nội dung bên dưới vào file đó để setting preset.{
"presets": ["es2015", "react"]
}"build": "webpack --config webpack.config.js --progress --colors" vào file package.json mà bạn đã init ở trên:{
"name": "react-mui-sample",
"version": "1.0.0",
"description": "this is sample that use material ui component for demo",
"main": "index.js",
"scripts": {
"test": "test",
"build": "webpack --config webpack.config.js --progress --colors"
},
"keywords": [
"reactjs",
"material-ui"
],
"author": "phungnc",
"license": "ISC",
"devDependencies": {
"babel-cli": "^6.10.1",
"babel-core": "^6.9.1",
"babel-loader": "^6.2.4",
"babel-preset-es2015": "^6.9.0",
"babel-preset-react": "^6.5.0",
"material-ui": "^0.15.0",
"react": "^15.1.0",
"react-dom": "^15.1.0",
"react-tap-event-plugin": "^1.0.0",
"webpack": "^1.13.1"
}
}module.exports = {
entry: {
app: './app.js'
},
output: {
path: __dirname + '/dist',
filename: 'bundle.js'
},
module: {
loaders: [
{
test: /\.js$/,
loaders: ['babel-loader'],
exclude: /(node_modules)/
}
]
}
}http://www.material-ui.com/#/get-started/usage
Coding, cấu trúc app:
Trước khi bắt đầu coding thì chúng ta hãy hình dung sơ qua về cấu trúc cũng như luồng build của nó như thế nào: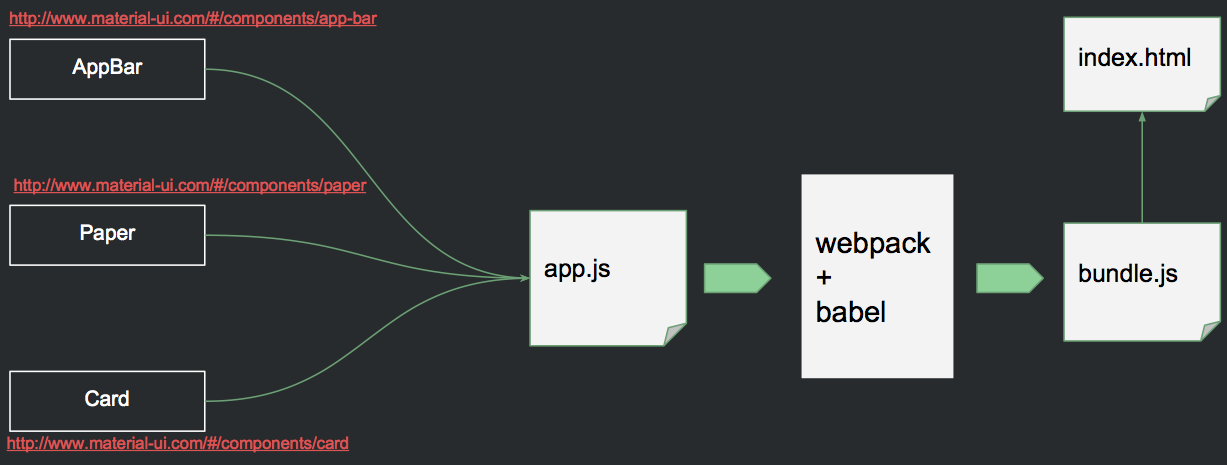
Cấu trúc source code của project sẽ như sau:
react-mui-sample
 |_ .babelrc             // file config của babel
 |_ webpack.config.json  // file config của webpack
 |_ package.json         // file package của project
 |_ node_module
 |_ app.js               // file chính của App
 |_ index.html           // file giao diện chính của App
 |_ dist                 // thư mục chứa file build
    |_ bundle.js         // file build
https://github.com/phungnc/reactjs-mui-simple-sample.git
Sau khi lấy về, hãy mở file app.js, và tham khảo hình tôi giải thích như bên dưới:

Build and Run
Hãy trỏ đến thư mụcreact-mui-sample, thực hiện lệnh build:npm run buildwebpack --config webpack.config.js --progress --colors trong file package.json.Và bây giờ bạn có thể mở file index.html lên và xem thành quả. Bạn có thể edit lại nội dung theo ý mình bằng cách thay đổi file app.js
Hy vọng bài viết này có thể giúp bạn bắt tay vào việc thử xây dựng cho riêng mình 1 giao diện web app bằng Material UI Component. Trong bài viết sau, tôi sẽ đưa ra 1 sample và hướng dẫn cách tạo 1 App phức tạp hơn.